please move this to FAQ unless you want this to be at the bottom of every search engine
TODO: test if xinput can detect 2 mice as 2 separate analogue devices, and experiment to see if the second mouse can be used as a clutch pedal AND/OR brake pedal for trailbraking. could be interesting!
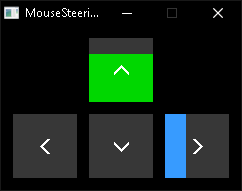
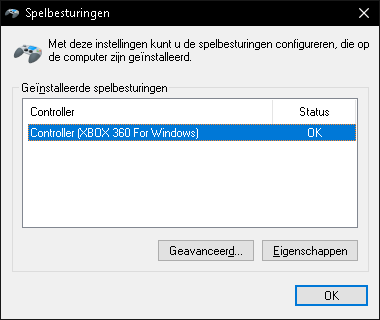
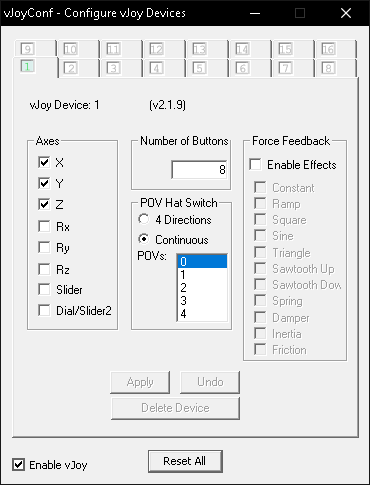
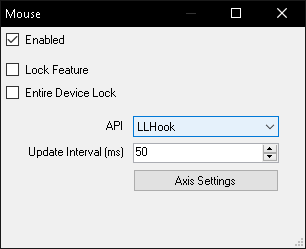
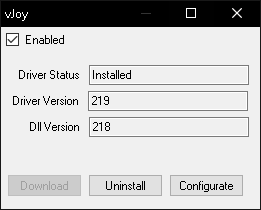
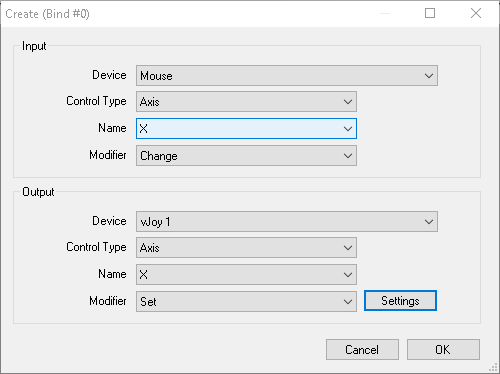
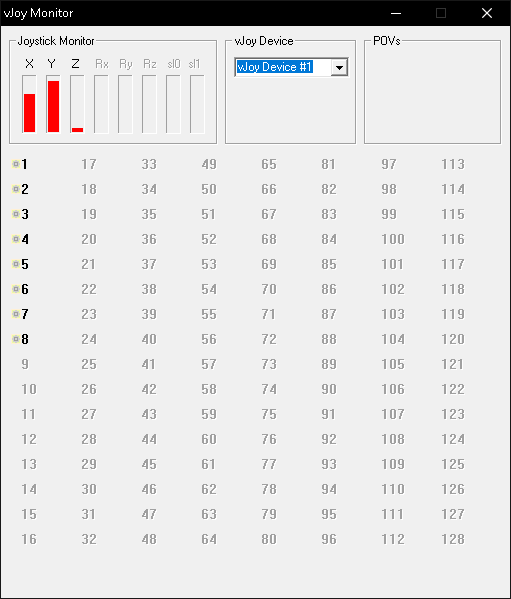
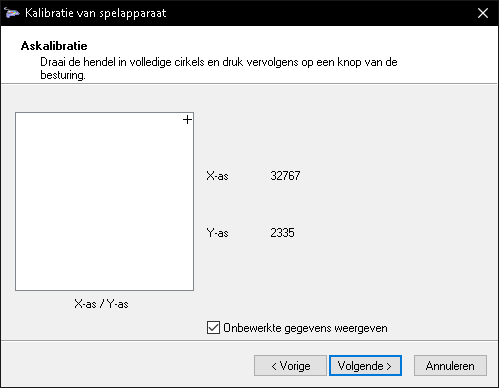
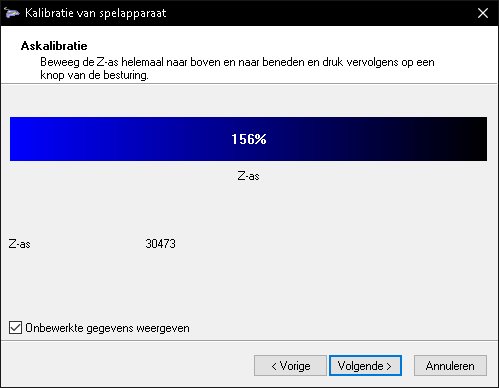
for other games (using vJoy / vXbox / ViGEmBus + feeder + remapping XYZ axis), -
scroll down to the comment section!
linux alternatives AND tl;dr included!
SLOW INTERNET WARNING: THERE ARE PICTURES!
NOTE: this is NOT a drift guide. maybe one day…
hello everyone. ![]() i have been asked numerous times by many people (0) “how do you even hold a drift with a mouse?!” - in this tutorial, i will be sharing my secret formula (spoiler alert: its ~30k combined hours in beamNG on me mom’s computer, pls dont judge…)! this may not differ that much from other guides for beamNG (and RBR!) on the internet, but nevertheless, i couldnt find one on beamMP (and rbr!). besides, it’s a pretty (cheap) niche and a hard-to-master method of driving! coming from communities such as richard burns rally and trackmania [citation needed], mouse control is a pretty cheap alternative to sim (big) rigs for any racing game! fortunately, beamNG allows you to bind wheel and pedal axis input to a mouse in-game without any third-party software. so, if you ever wanted to drive better (drifting a FWD) or are waiting for your new wheel from aliexpress (69nm of finger breaking action) - embrace the simulator genre where your mouse acts as an analogue joystick without any digital controls AND without physical joysticks themselves! wItHoUt fUrThEr aDo, LeTs jUmP rIgHt InTo iT
i have been asked numerous times by many people (0) “how do you even hold a drift with a mouse?!” - in this tutorial, i will be sharing my secret formula (spoiler alert: its ~30k combined hours in beamNG on me mom’s computer, pls dont judge…)! this may not differ that much from other guides for beamNG (and RBR!) on the internet, but nevertheless, i couldnt find one on beamMP (and rbr!). besides, it’s a pretty (cheap) niche and a hard-to-master method of driving! coming from communities such as richard burns rally and trackmania [citation needed], mouse control is a pretty cheap alternative to sim (big) rigs for any racing game! fortunately, beamNG allows you to bind wheel and pedal axis input to a mouse in-game without any third-party software. so, if you ever wanted to drive better (drifting a FWD) or are waiting for your new wheel from aliexpress (69nm of finger breaking action) - embrace the simulator genre where your mouse acts as an analogue joystick without any digital controls AND without physical joysticks themselves! wItHoUt fUrThEr aDo, LeTs jUmP rIgHt InTo iT ![]()
![]()


 FULL MOUSE CONTROL:
(not recommended for beginners)
(FOR KB+M SCROLL DOWN)
this is the setup that i use. you’ll probably find kb+m easier. see down below.
- you will need: a mouse with low DPI (sensitivity), preferrably without a trackball, with side buttons (mouse3, mouse4, mouse5, mouse6), vertical mice, mouse keypads and mice with haptic feedback are welcome and encouraged (carpal tunnel syndrome alert!)
usually, when it comes to driving by means of a mouse, people refer to keyboard AND mouse controls, however, i drive by only using A mouse (singular).
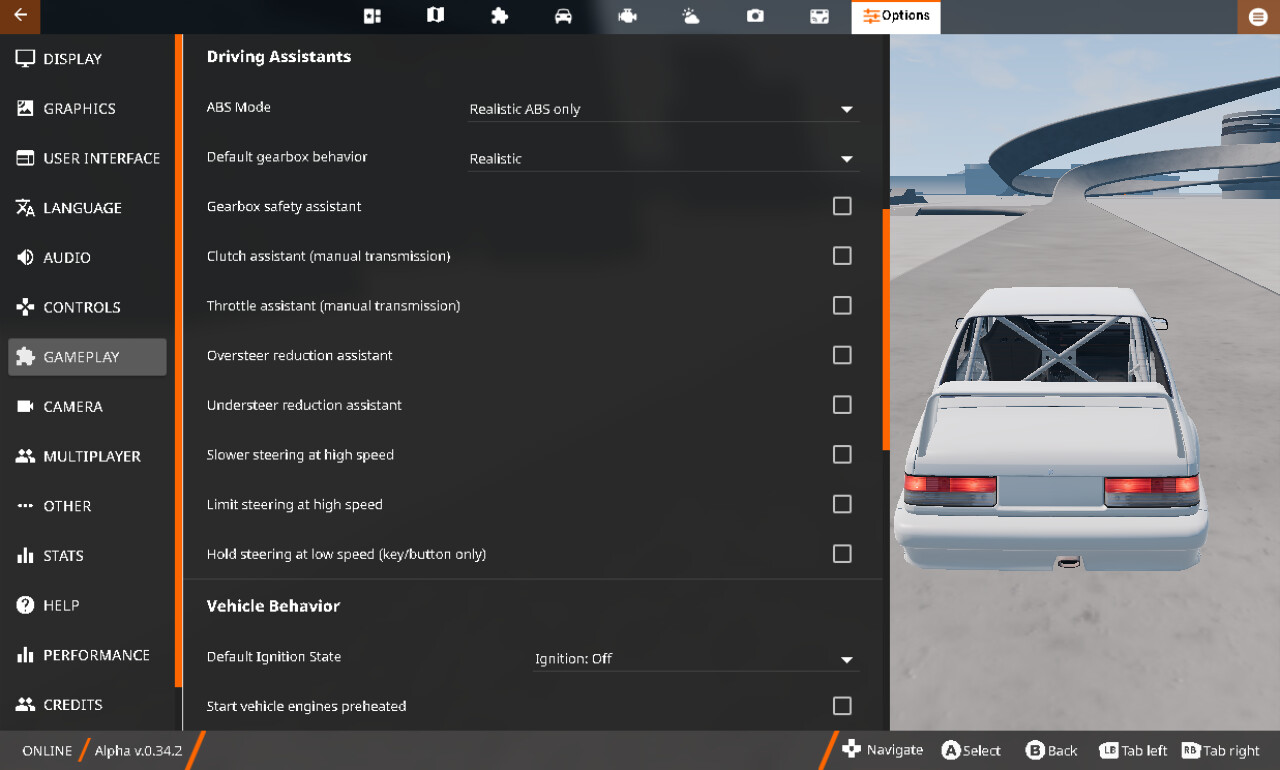
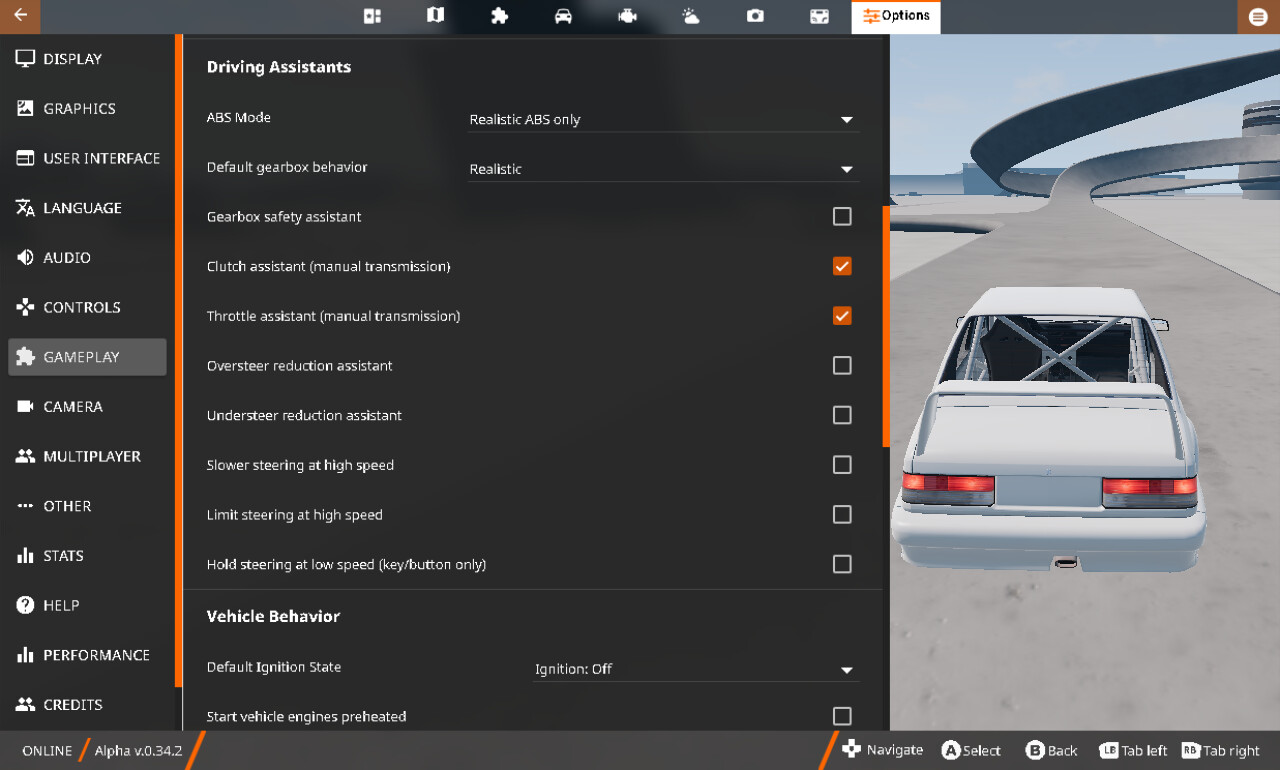
- trivia: disable all and any driving assists:
– if you are struggling with shifting, enable clutch assist
– if you are driving regular cars, dont drift or rally, enable throttle assist
– vehicle behaviour should be all off
(because otherwise you will rev the engine while in the menu)
(res small cos im on a steam deck :P)
- (!) the problem: clutch is the THIRD pedal, and since we are limited only to TWO analogue axes, clutch will be inevitably bound to the digital, binary key input (value of 0 OR 1), therefore we can only clutch kick just to shift a gear, which is pretty harmful to the transmission and the engine. however, if we’re drifting, there are such other techniques much easier on your car, for example, weight transfering and the use of the handbrake. anyway, such rapid clutch depressions can be mitigated by the built-in filtering logic which smoothes such binary key presses in beamNG (by default these are A and D for keyboard users) that i will talk about later, although that wont be enough. anyway, all of this is not a problem if we are driving a seq/DCT/auto or if we are clutch kicking in a professional racing automobile in a videogame, however…
– (if that bothers you, skip to the second part of the tutorial that includes the keyboard in the setup. it’s much more casual.)
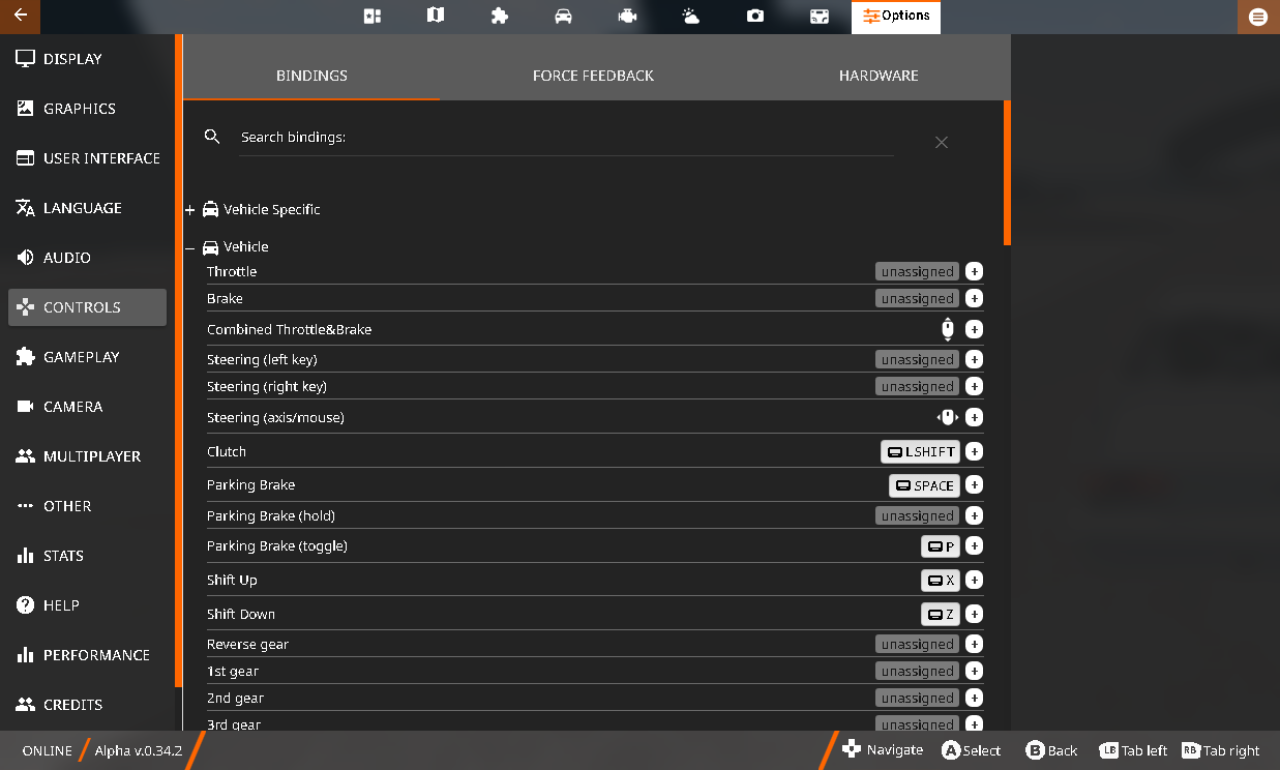
after that, in the controls > vehicle, unbind (unassign) keyboard keys that you were using to control the car with, for example: “throttle”, “brake” - unbound (because we’re using combined throttle&brake instead), then “steering (left key)” and “steering (right key)” - unbound (because we’re using steering (axis/mouse). this is because such keys will interfere with mouse controls and will prioritise them in the middle of driving if you accidentally press them.

(do not worry, at the bottom of the list there are reset buttons)
btw the right mouse button (MOUSE2) is unboundable, because it is “hardcoded to camera rotation”, as the devs replied, and cannot be changed, so, that sucks…
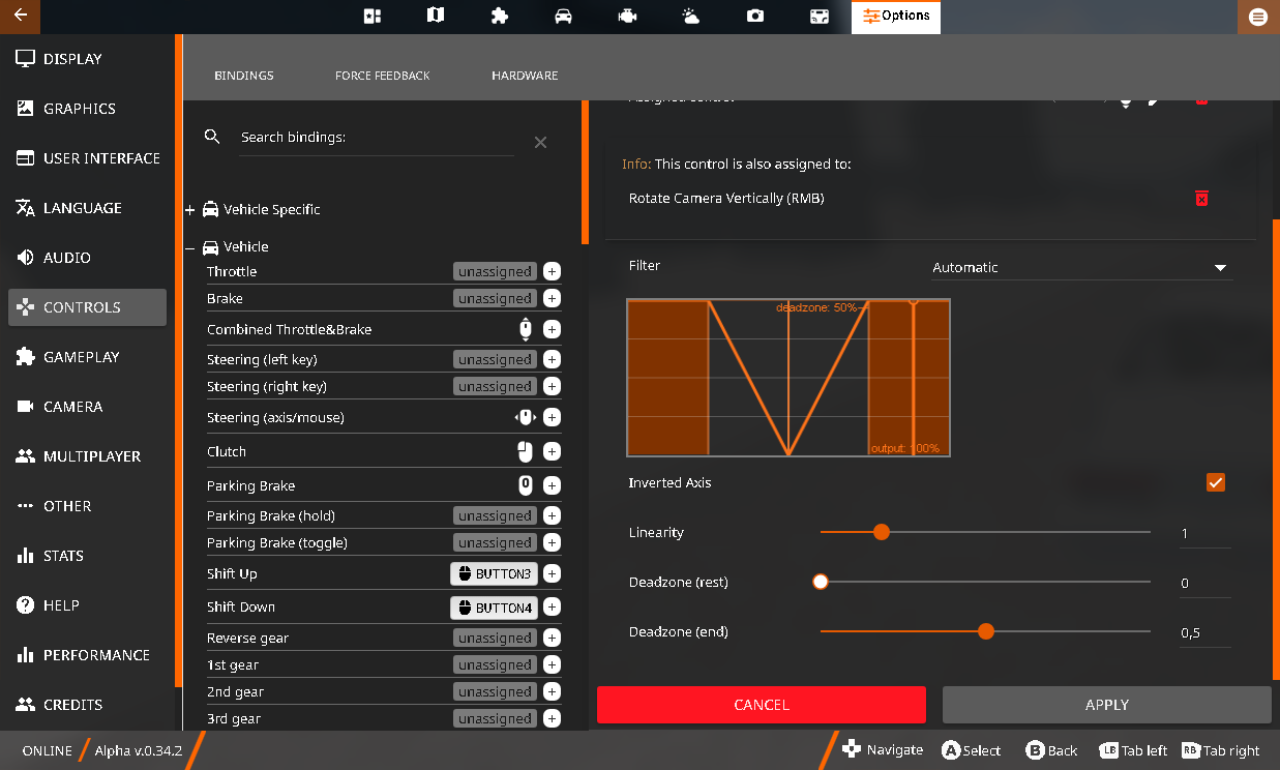
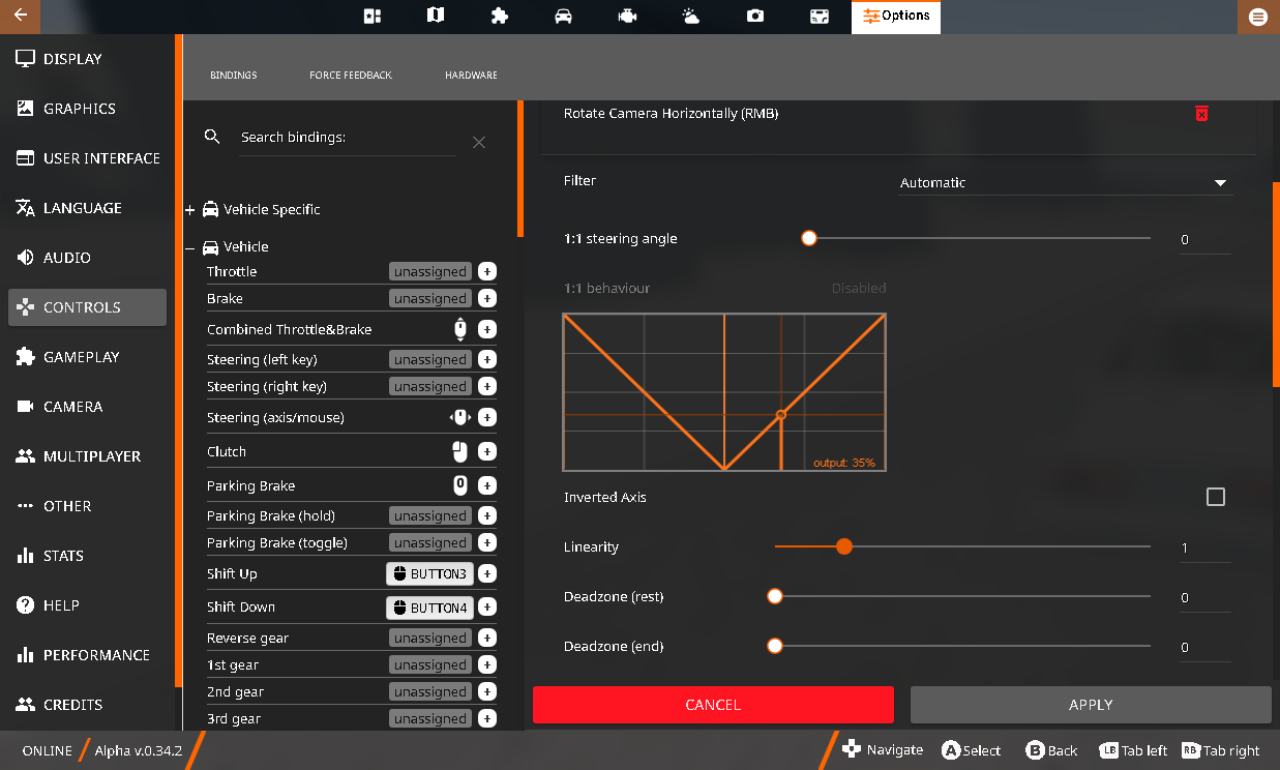
- COMBINED THROTTLE&BRAKE:
– bind to VERTICAL MOUSE AXIS (Y AXIS) - just move it up and down
– filter: automatic (automatically sets to wheel (direct) since it is an analogue input!)
– inverted axis: enabled (unless you like natural scrolling or prefer brakes to be applied by moving the mouse upwards)
– linearity: 1
– deadzone (rest): 0
– deadzone (end): 0,5 (this is the distance your hand should travel to go full throttle or full brakes - lower for more precision, higher for faster response. experiment!)
- STEERING (AXIS/MOUSE):
– bind to HORISONTAL MOUSE AXIS (X AXIS) - just move it left and right
– filter: automatic
– inverted axis: off
– linearity: 1
– deadzone (rest): 0
– deadzone (end): 0
– force feedback configuration: oh so you have a wheel now, huh? unless you have haptics in your mouse, configure its intensity.
but wait! theres more…
-
CLUTCH
– bind to LEFT MOUSE BUTTON
– filter: key (smooth) - (do you remember why we’re doing this?) -
PARKING BRAKE
– bind to MOUSE SCROLL WHEEL (press it, also known as MOUSE3, not to be confused with BUTTON3, which is a side button)
– this is supposed to be the FOURTH axis, however, we’ll be smashing it regardless whether it can be pulled slightly or not. and as a matter of fact, not even wheel owners have such luxury of having a dedicated handbrake, therefore this stays unfiltered. -
SHIFT UP
– bind to BUTTON3 (side button) -
SHIFT DOWN
– bind to BUTTON4 (side button) -
(optional) TOGGLE IGNITION STATE
– bind to BUTTON5 (side button)
(may not work if you are on linux) -
(optional) SOME OTHER BUTTON
– bound to BUTTON6 (side button)
(may not work if you are on linux)
in controls > camera:
- CENTRE CAMERA
– bind to MOUSE SCROLL WHEEL (press it, same as handbrake)
(because you may accidentally press right click and move your camera…
…and right mouse button is hardcoded and unboundable, remember?)
when you are done…
now, think of your screen as a mathematical graph of a function. your centre of the screen, 0(X) 0(Y), is where you apply no throttle, no brakes and no steering input. (NOTE: you may prefer to see the mouse cursor on your screen. if there is no cursor, try borderless mode or changing the renderer). gently move your mouse (cursor) upwards to depress the gas pedal. then, slowly, very slowly move your mouse downwards to apply brakes. later you will realise how important it is not to go “full ABS mode”, also known as “to lock up”, if you dont have ABS. when you will understand the basics, then you can try taking corners at different speeds. remember, it does matter whether you release or depress it. unfortunately, and i only say this now but you probably saw it coming - no, you cannot trail brake, as there is no way to simultaneously brake and apply throttle. (EDIT: it IS possible, but it involves third-party software. it requires to invert either the Y or Z axis, so that brakes are applied to the remaining percent of the throttle not being depressed, e.g. throttle 75% > brakes 25%. however, this bind should be an on & off toggle, otherwise it will be impossible to drive normally. to learn more, scroll down to the comment section). however, let it not disappoint you as it doesnt make you any less competitive! i believe you can do this!
you can see the exact inputs you are doing in UI Apps > Pedals and Axis
and that’s about it! happy trailing, drifting, rallying, baja-ing, racing, cruising, etc! <3
MOUSE + KEYBOARD CONTROL: 

(recommended for beginners)
this is the second part of the tutorial that you probably skipped to because it is just borderline insane to shift gears by using only a mouse. nonetheless, welcome, new mouse driver! this is a much simpler way to drive a vehicle in beamNG without worrying about shifting. this is generally the FASTER way to learn any automobile sport, including drifting! wItHoUt fUrThEr aDo, LeTs jUmP rIgHt InTo iT ![]()
![]()
- you will need: a mouse with low DPI (sensitivity), preferrably without a trackball, with side buttons (mouse3, mouse4, mouse5, mouse6), vertical mice, mouse keypads and mice with haptic feedback are welcome and encouraged (carpal tunnel syndrome alert!)
disable the same assists as in the full mouse tutorial above, except we do simplify it a bit - we are enabling the game shifting logic (albeit not perfect and unrealistic) to ease our keyboard struggles:
(res small cos im on a steam deck :P)
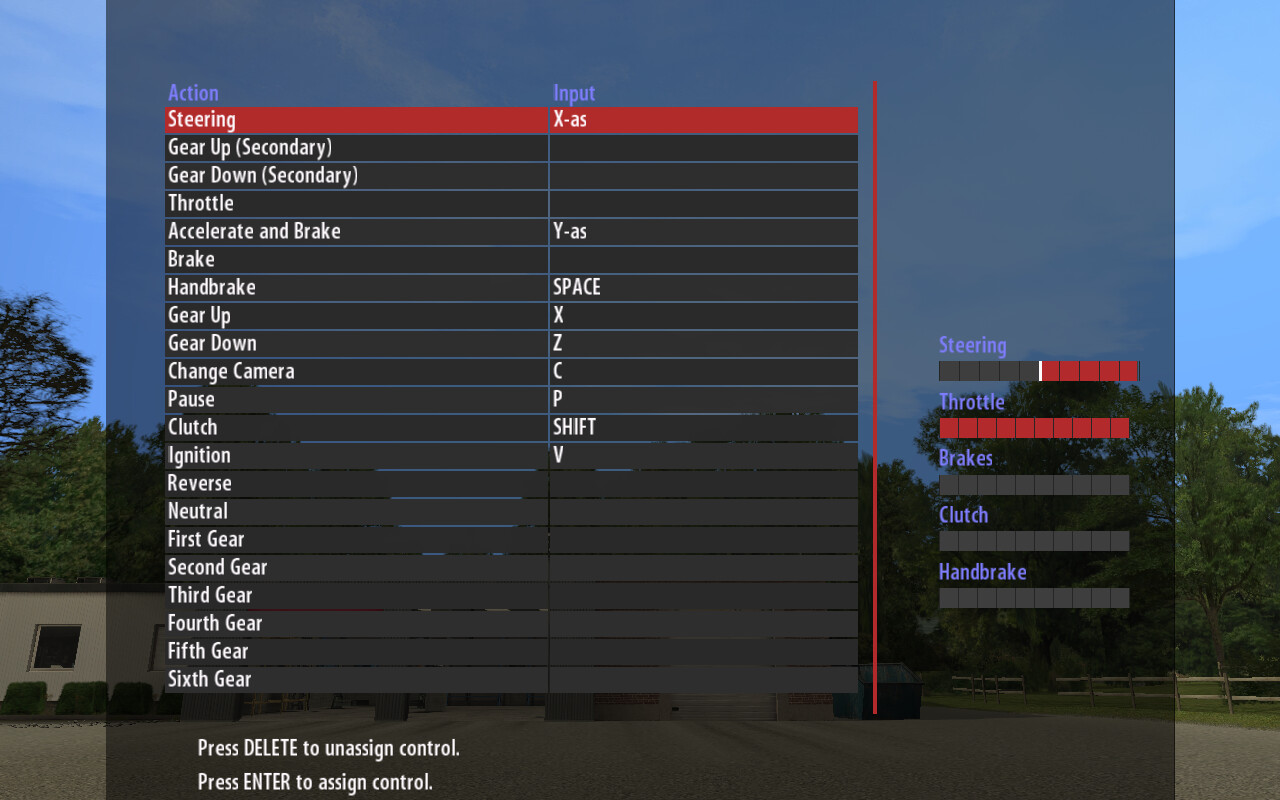
after that, in the controls > vehicle, unbind (unassign) keyboard keys that you were using to control the car with, for example: “throttle”, “brake” - unbound (because we’re using combined throttle&brake instead), then “steering (left key)” and “steering (right key)” - unbound (because we’re using steering (axis/mouse). this is because such keys will interfere with mouse controls and will prioritise them in the middle of driving if you accidentally press them.
(do not worry, at the bottom of the list there are reset buttons)
TWO IMPORTANT BINDINGS:
- combined throttle&brake - same settings as above in full mouse control section… (scroll up)
- steering (axis/mouse) - same settings as above in full mouse control section… (scroll up)
(sorry, but you had to pay attention… that im lazy af!)
but wait! theres more…
-
CLUTCH
– bind to LSHIFT
– filter: key (smooth) - (as mentioned earlier, this is supposed to be our third axis that we cant have on a mouse, therefore we are trying to smooth its transition between 0 and 1 value states)
(since the assists are doing the shifting job for us here, we use the clutch for the clutch kick technique to intentionally lose the grip) -
PARKING BRAKE
– bind to SPACEBAR
– once again, the forgotten FOURTH axis. filtering can be omitted… -
SHIFT UP
– bind to X
(can be any key, this is just for better posture and less wrist fatigue) -
SHIFT DOWN
– bind to Z
(can be any key, this is just for better posture and less wrist fatigue)
next are the keys you would have sacrificed if you were in full mouse control
- FLASH HIGH BEAM HEADLIGHTS
– bind to LEFT MOUSE BUTTON
(this is MAINLY to indicate you wish to overtake in a race)
in controls > camera:
-
CENTRE CAMERA
– bind to MOUSE SCROLL WHEEL (press it) or BUTTON3 (side button)
(in case you accidentally move your camera with the UNBOUNDABLE right click) -
LOOK BACK
– bind to **MOUSE SCROLL WHEEL (press it) or BUTTON3 (side button)
(in case you cant see who is in the mirror,
these two keys should be easily accessible,
as you will be using them A LOT)
(optional) in controls > beamMP (at the bottom of the list):
-
(optional) PLAYER NAMETAGS
– bind to BUTTON4 (side button)
(sometimes they’re distracting) -
(optional) TOGGLE CHAT
– bind to BUTTON3 (side button)
(if you are using the new imgui experimental beamMP chat, otherwise you can hide the interface with ALT+U)
when you are done…
now, think of your screen as a mathematical graph of a function. your centre of the screen, 0(X) 0(Y), is where you apply no throttle, no brakes and no steering input. (NOTE: you may prefer to see the mouse cursor on your screen. if there is no cursor, try borderless mode or changing the renderer). gently move your mouse (cursor) upwards to depress the gas pedal. then, slowly, very slowly move your mouse downwards to apply brakes. later you will realise how important it is not to go “full ABS mode”, also known as “to lock up”, if you dont have ABS. when you will understand the basics, then you can try taking corners at different speeds. remember, it does matter whether you release or depress it. unfortunately, and i only say this now but you probably saw it coming - no, you cannot trail brake, as there is no way to simultaneously brake and apply throttle. (EDIT: it IS possible, but it involves third-party software. it requires to invert either the Y or Z axis, so that brakes are applied to the remaining percent of the throttle not being depressed, e.g. throttle 75% > brakes 25%. however, this bind should be an on & off toggle, otherwise it will be impossible to drive normally. to learn more, scroll down to the comment section). however, let it not disappoint you as it doesnt make you any less competitive! i believe you can do this!
you can see the exact inputs you are doing in UI Apps > Pedals and Axis
and that’s about it! happy trailing, drifting, rallying, baja-ing, racing, cruising, etc! <3
please ask any questions - i will help you!
P.S. fun fact: now you can tune your car freely. very soon you will realise that tunes that you had before for keyboard dont work well or at all for mouse and/or wheel. good luck!
P.P.S. analogue keyboards (e.g. by Wooting) are awesome. however, none of us are that rich…
drifting AND tuning tutorial coming soon…
<3